FRP Bypass Android 11: The Working Guide for 2025
Android 11 TalkBack FRP exploits are patched. Our guide, tested on Samsung and MTK/Qualcomm, provides the real, chipset-based PC methods that actually work to bypass the lock.
Staring at the Google account verification screen on a reset Android 11 device is a common dead end. Maybe you bought a second-hand phone, and now it’s an expensive paperweight. You’ve likely spent hours watching video guides, only to find the TalkBack or accessibility options they rely on are simply gone from your phone. You are not alone, and your frustration is valid. Those older methods are now patched and obsolete.
This guide provides tested, up-to-date procedures for bypassing the Google account on Android 11. We’ve moved beyond theory and focused on what works today. The methods here are the result of hands-on testing on Samsung (Exynos/Qualcomm), Motorola (Qualcomm/MTK), and generic Unisoc devices running late 2022-2023 security patches—the exact ones where common exploits fail. We will show you the complete process.
Why the TalkBack FRP Method on Android 11 Fails
Many users find themselves in a frustrating loop. After a factory reset, their device demands the previous owner’s Google account. Following popular online videos, they attempt to use the TalkBack feature, but the crucial ‘Help & feedback’ menu option is completely missing. This is not an error; it is an intentional security update from Google.
Google systematically patched the vulnerabilities within its accessibility suite in later Android 11 security updates. The ability to open a browser or settings menu through TalkBack was an exploit, and it has been closed on devices with security patches from mid-2022 onward. This is precisely why the TalkBack FRP method for Android 11 now fails. Similarly, other ‘no PC’ techniques, like using emergency dialer codes or exploiting SIM card lock screens, have also been patched.
Your experience trying these older methods is real. The security of Android 11 has evolved, making a computer and specific software tools a requirement for nearly all modern Factory Reset Protection (FRP) bypass procedures.
Choosing Your Approach: The Manual Path vs. a Dedicated FRP Tool
With older exploits patched, you have two primary paths to bypass Google account verification: a manual, technical procedure or a dedicated Android 11 FRP tool. The manual method offers a free solution at the cost of time and risk, whereas a professional tool offers speed and safety for a price. This table presents an honest trade-off to help you decide.
| Criteria | Manual Flashing Method | Dedicated FRP Tool |
| Success Rate | Moderate to High. Success depends on finding the correct files for your exact model and following precise steps—high chance of failure or bricking if incorrect files are used. | Very High. The software is designed to automatically identify the device and apply a tested procedure, which minimizes user error. |
| Time Cost | High. It can take several hours to research and locate specific files (firmware, drivers, loaders), install software, and perform the multi-step process. | Low. Typically resolves the issue in 5-15 minutes with a guided, automated process. |
| Required Skill | High. Requires understanding concepts like firmware binaries, boot modes (Odin, EDL, BROM), and manual driver installation. | Low. Designed for users with basic computer literacy. You follow the on-screen instructions. |
| Financial Cost | Free (in theory). The software tools are free, but the time spent researching is a hidden cost. | Paid. These tools are usually subscription-based, making them a good choice for repair shops or users who value their time. |
How to Bypass FRP on Android 11: A Chipset-Based Guide
A universal solution for a modern Android 11 FRP bypass does not exist. Success depends entirely on using the correct method for your device’s specific hardware. A critical point is that ADB/fastboot commands are ineffective at the FRP screen because USB debugging is disabled, and you can’t enable it. The following procedures are tailored to the device’s chipset.
1. Samsung (Qualcomm/Exynos Chipsets)
For Samsung devices, Odin is your transport tool, but the files you flash are what do the work. The goal is to flash a specific firmware that allows access to settings.
- Identify Your Exact Model & Binary Version: Boot into recovery mode (Power + Volume Up). Write down the full model number (e.g., SM-A325F) and the firmware build number (e.g., A325FXXS4CWB2). The number after the ‘S’ (in this case, ‘4’) is your binary version. This is non-negotiable.
- Find and Download Combination Firmware: The biggest challenge is finding the right file. Search on reputable firmware sites like SamFW.com for one
combination firmwarethat matches your exact model and binary version. Flashing a lower binary will fail, and the wrong model can brick the phone. - Enter Download Mode: Power off the device. Hold Volume Up + Volume Down and connect the USB cable to enter the blue “Download Mode” screen.
- Flash with Odin: Open Odin on your PC. Load the combination file you downloaded into the AP slot. Ensure no other boxes are checked. Click ‘Start’.
- Access Settings and Reset: The phone will reboot into a special factory mode. Navigate to Settings > General management > Reset > Factory data reset. This will wipe the device and the Google account lock.
- Flash Full Stock Firmware: The phone is not usable in factory mode. You must now find the full stock firmware (matching your model and binary) and flash it using Odin to restore the device to its normal state.
Pro Tip from the Trenches: I learned the hard way that flashing firmware with the wrong CSC (carrier code) can kill the Wi-Fi or cause network issues. Always try to match the CSC from your original firmware if possible.
2. MediaTek (MTK) Chipset Devices
MTK devices (found in many Motorola, Xiaomi, and budget phones) are bypassed at a pre-boot level, often called BROM mode.
- Install MTK VCOM Drivers: Your PC needs the correct MediaTek VCOM USB drivers to talk to the phone before Android boots.
- Get an MTK Tool and Required Files: You’ll need a PC tool like SP Flash Tool (free). For modern secure MTK devices, SP Flash Tool alone is not enough. You will also need to find a
DA (Download Agent)file and anAuth (Authentication)file specific to your phone’s model. These files bypass the manufacturer’s security layer. - Connect in BROM Mode: Power the device completely off. Open your MTK tool on the PC. Press and hold Volume Up + Volume Down before connecting the USB cable. A real tech knows the timing is tricky; holding the buttons first is key. The tool should then detect the device.
- Execute FRP Reset: In your tool, load the DA and Auth files. Navigate to the ‘Format’ or ‘FRP’ tab and select the option to ‘Reset FRP’ or ‘Erase FRP’. The tool communicates directly with the chipset to remove the lock.
3. Qualcomm Chipset Devices (Non-Samsung)
Many Motorola, LG, and Nokia devices use Qualcomm chips. The bypass method involves forcing the device into Emergency Download Mode (EDL).
- Install Qualcomm HS-USB QDLoader 9008 Drivers: This is the most crucial step. Without the correct EDL/9008 mode drivers, your PC will not see the phone.
- Find a Qualcomm Flashing Tool: You’ll need a tool like QFIL (Qualcomm Flash Image Loader) and the specific
programmerfile (often called a firehose file) for your device model. - Enter EDL Mode: This can be tricky. For some models, you power off, hold both volume buttons, and connect the USB. For others, you may need to use a special “EDL cable” or even open the device to short two specific “test points” on the motherboard.
- Load Files and Reset FRP: Once the device is detected in QFIL as ‘Qualcomm HS-USB QDLoader 9008’, load the programmer file. Then, use the tool’s partition manager or FRP reset function to erase the FRP partition.
4. Unisoc / Spreadtrum (SPD) Chipset Devices
Common in budget-friendly devices, Unisoc (formerly Spreadtrum) has its own unique process.
- Install SPD Drivers: Download and install the specific Unisoc/SPD SCI USB drivers for Windows.
- Use an SPD-Aware Tool: The most common free tool is the SPD Research Tool or Upgrade Tool.
- Enter SPD Boot Mode: Power the phone off. Hold the Volume Down button and connect the USB cable. Your PC’s Device Manager should show an “SCI USB” device.
- Erase FRP: Load the firmware package (
.pacfile) for your device into the tool. You don’t need to flash everything. Find the settings within the tool to specifically ‘Erase FRP’ or ‘Clear User Data’, which will remove the lock.
Critical First Step: Installing USB Drivers Correctly
The single most common point of failure is an improper connection between the phone and PC. This is almost always a driver issue. You must ensure your PC can identify the device in its specialized flashing modes, not just as a media device.
Pre-Flight Checklist:
- Download and Install Drivers: Do not rely on Windows Update. Manually download the specific driver package for your device’s chipset (Samsung, MTK, Qualcomm, or SPD).
- Verify in Device Manager: This step is non-negotiable. Open Device Manager in Windows before you begin.
- Connect in the Correct Mode and Watch:
- A Samsung in Download Mode should appear under ‘Modems’ or ‘Ports (COM & LPT)’.
- An MTK device connected while off should briefly appear as ‘MediaTek PreLoader USB VCOM Port’.
- A Qualcomm device should appear as ‘Qualcomm HS-USB QDLoader 9008’ when in EDL mode.
- A Unisoc device should show up as an ‘SCI USB’ device.
If you see a yellow exclamation mark or ‘Unknown Device’, the drivers are not installed correctly. Stop and fix the driver issue before proceeding.
Troubleshooting Matrix: Fixing Common FRP Bypass Errors
| Error / Symptom | Probable Cause & Solution |
| Odin: FAIL! (Auth) or FAIL! (Secure Check) | The firmware is not signed by Samsung or is incompatible. Ensure you are using official or trusted files. It can also indicate an outdated version of Odin. |
| Odin: FAIL! (Binary Mismatch) | The firmware’s binary version (e.g., U4) is lower than the one on the phone (e.g., U5). Android’s rollback protection is blocking the downgrade. You must find firmware with a binary version equal to or higher than your device’s. |
| PC Tool does not detect MTK/Qualcomm device | This is a driver or mode issue. Reinstall drivers, reboot your PC, and use a different USB port/cable. For MTK, ensure you’re holding volume buttons before plugging in. For Qualcomm, confirm you’re successfully in EDL/9008 mode. |
| Phone is stuck in a bootloop after flashing | This usually happens after a partial or incorrect flash. The solution is to re-enter Download/Fastboot mode and flash the correct, full stock firmware for your device. |
Frequently Asked Questions About Android 11 FRP Bypass
Can I bypass FRP on Galaxy A12 (Android 11) without a PC?
For nearly all Android 11 devices with 2022-and-later security patches, a PC is required. The ‘no PC’ exploits that worked on older software, such as those using TalkBack, have been patched by Google.
Is there a safe, legitimate APK that works on Android 11?
No. There are no legitimate APKs that can bypass the FRP lock on a secured Android 11 device. Any site offering a ‘FRP bypass APK’ for modern Android is likely distributing malware. Solutions require PC software that interfaces with the phone at a pre-boot level.
Does Odin alone remove FRP on Samsung?
No, Odin itself does not remove FRP. It is a flashing utility. You must use Odin to flash specific files, like a combination firmware, which then grants you access to the phone’s settings to remove the Google account.
How do I enable USB debugging if ADB says ‘unauthorized’?
You can’t. The ‘unauthorized’ message appears because USB debugging is disabled and can only be enabled from within the phone’s main settings menu, which FRP is blocking you from accessing.
Will flashing the wrong firmware brick my device?
Yes, this is the main risk of the manual method. Flashing firmware for a different model or with a lower binary number can hard-brick the device. Always double-check your device’s exact model and binary in recovery mode before flashing.
The Official Alternative: Google Account Recovery
For individual owners, this is always the first and safest option. For technicians handling client devices where this isn’t possible, the technical methods above are necessary. But if the device is yours, always try this first.
- Visit the Recovery Page: On another device, go to
g.co/recover. - Enter Your Email or Phone Number: If you forget the email, the phone number associated with the account often works.
- Answer Security Questions: Verify your identity by answering questions about previous passwords or recovery email addresses.
- Reset Your Password: Once confirmed, you can reset your password.
After resetting the password, wait a few hours. Then, use the original email with the new password on the locked phone to pass the Google account verification screen.
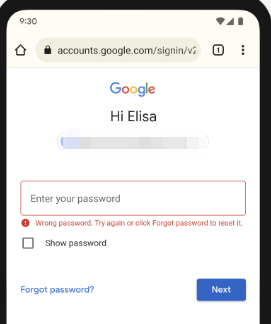
The first step of the official Google account recovery process.
You Have a Path Forward
The frustration of a locked phone and the confusion over patched methods like TalkBack are solvable. You now have a clear breakdown of the manual methods that work, from locating the right Samsung firmware to putting an MTK or Qualcomm device into the correct mode. The process is technical and requires careful attention to detail, but it is achievable.
If you are a repair professional or someone who values a quick, safe solution, a dedicated Android 11 FRP tool can save you hours of searching for files and troubleshooting drivers. It automates these complex steps into a few clicks. The choice is yours: invest your time to learn the manual process, or invest in a tool for efficiency. Either way, you can now move past the FRP screen and get that device working again.
More Related Articles
- The Complete 2025 Guide to bypass FRP on Samsung S24+
- FRP Bypass Android 14: The Proven Method for 2025
- How to bypass the FRP Lock on Moto G Play (Android 10) in 2025